
How to deploy a NestJS app on your VPS
NestJS has become one of the most popular Node.js frameworks for building scalable server-side applications. With its modular architecture, dependency injection, and TypeScript support, it's the go-to choice for many backend developers. However, deploying a NestJS application on your own VPS (Virtual Private Server) can sometimes be challenging.
What is NestJS?
NestJS is a progressive Node.js framework built with TypeScript that enables developers to build efficient, reliable, and scalable server-side applications with features like:
- Dependency Injection system
- Modular architecture
- Express/Fastify compatibility
- WebSockets support
- Microservices support
- GraphQL integration
- TypeScript support
- Extensive CLI tooling
These features make NestJS an excellent choice for building modern backend applications, from simple APIs to complex enterprise applications.
The Simplest Way to Deploy NestJS on Your VPS
While there are several ways to deploy a NestJS application on your own VPS, the simplest and most efficient method is to use JustDeploy. JustDeploy streamlines the deployment process, handling all the complexities of server configuration, Docker setup, and continuous deployment.
Step-by-Step Guide to Deploy NestJS with JustDeploy
Let's walk through the complete process of deploying your NestJS application using JustDeploy on your VPS.
Step 1: Connect to your VPS via SSH
First, connect to your VPS using SSH. If you're using Linux or macOS, open your terminal and use the following command:
ssh username@your_server_ip
Replace username with your actual username and your_server_ip with your server's IP address.
Step 2: Install JustDeploy
Once connected to your server, install JustDeploy using the following command:
curl -fsSL https://get.justdeploy.app | bash
This command downloads and installs JustDeploy on your VPS, setting up everything you need to deploy your applications.
Step 3: Access the JustDeploy Dashboard
After installation, you can access the JustDeploy dashboard through your web browser by navigating to your server's IP address on port 5915:
http://your_server_ip:5915
Replace your_server_ip with your actual server IP address.
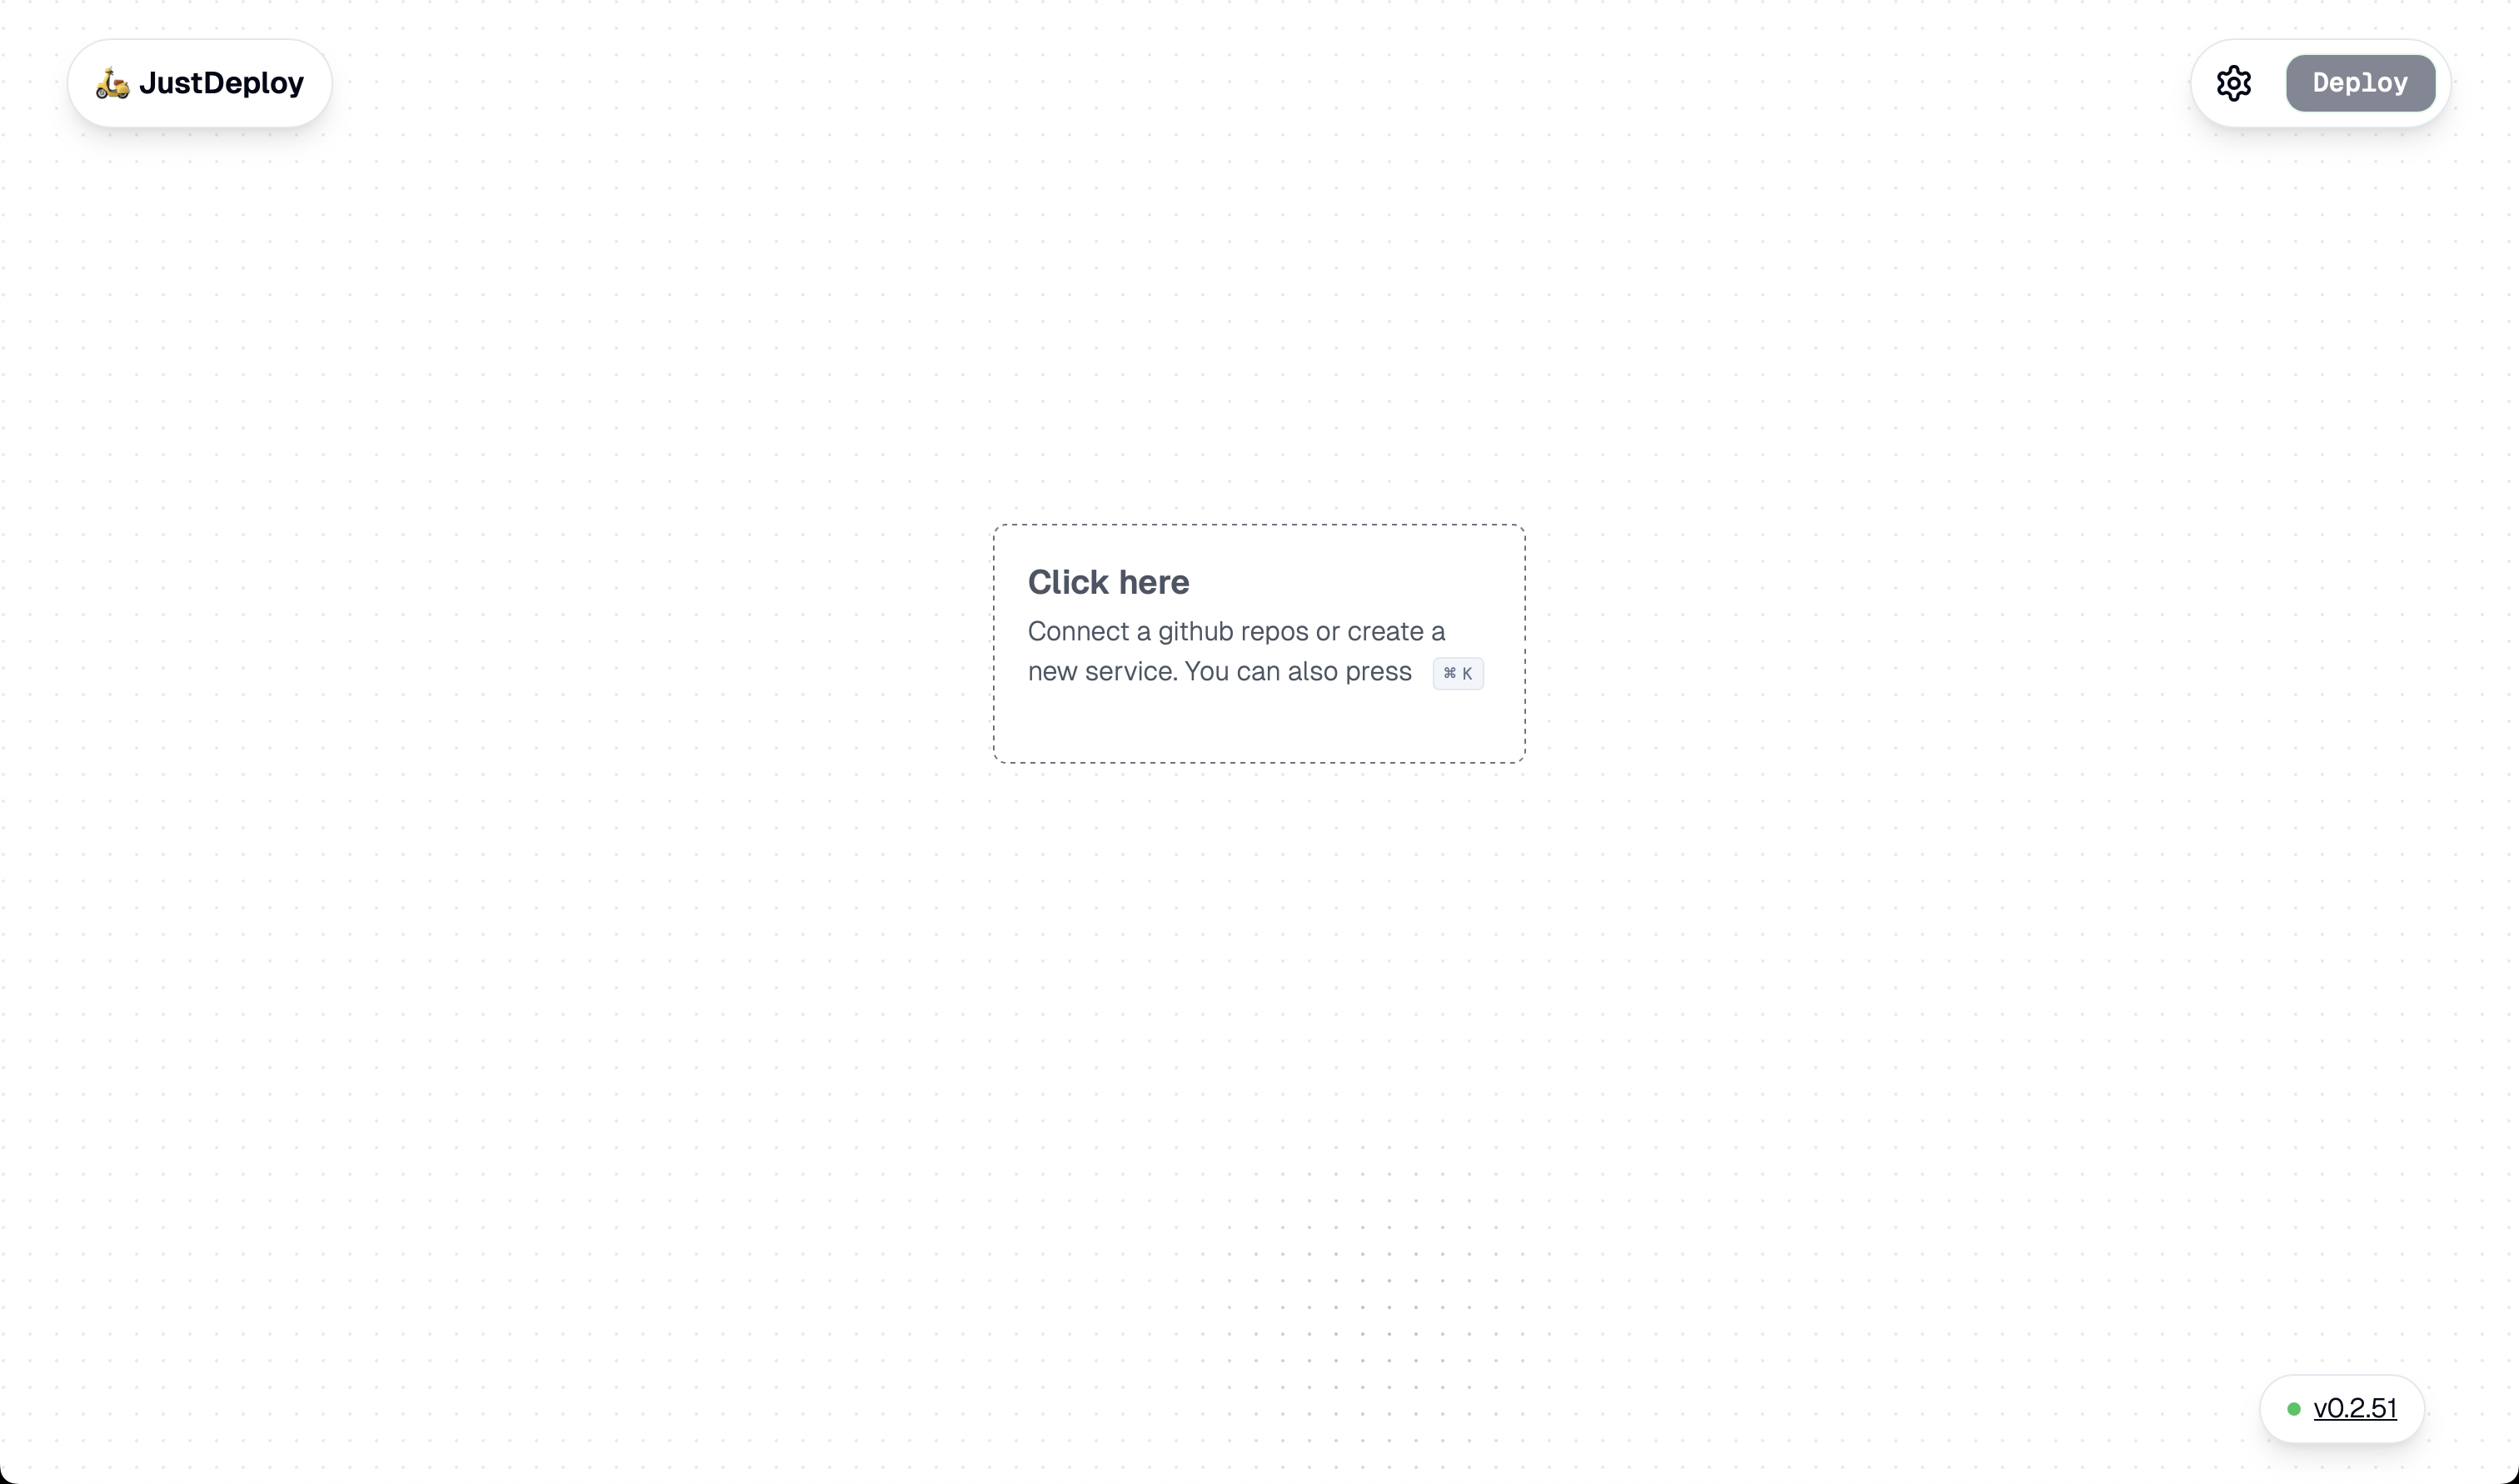
Step 4: Connect Your GitHub Account
To deploy your NestJS application, you'll need to connect JustDeploy to your GitHub account. In the JustDeploy dashboard:
- Click on the "Connect with GitHub" button
- Authorize JustDeploy to access your repositories
- Select the repositories you want to make available for deployment

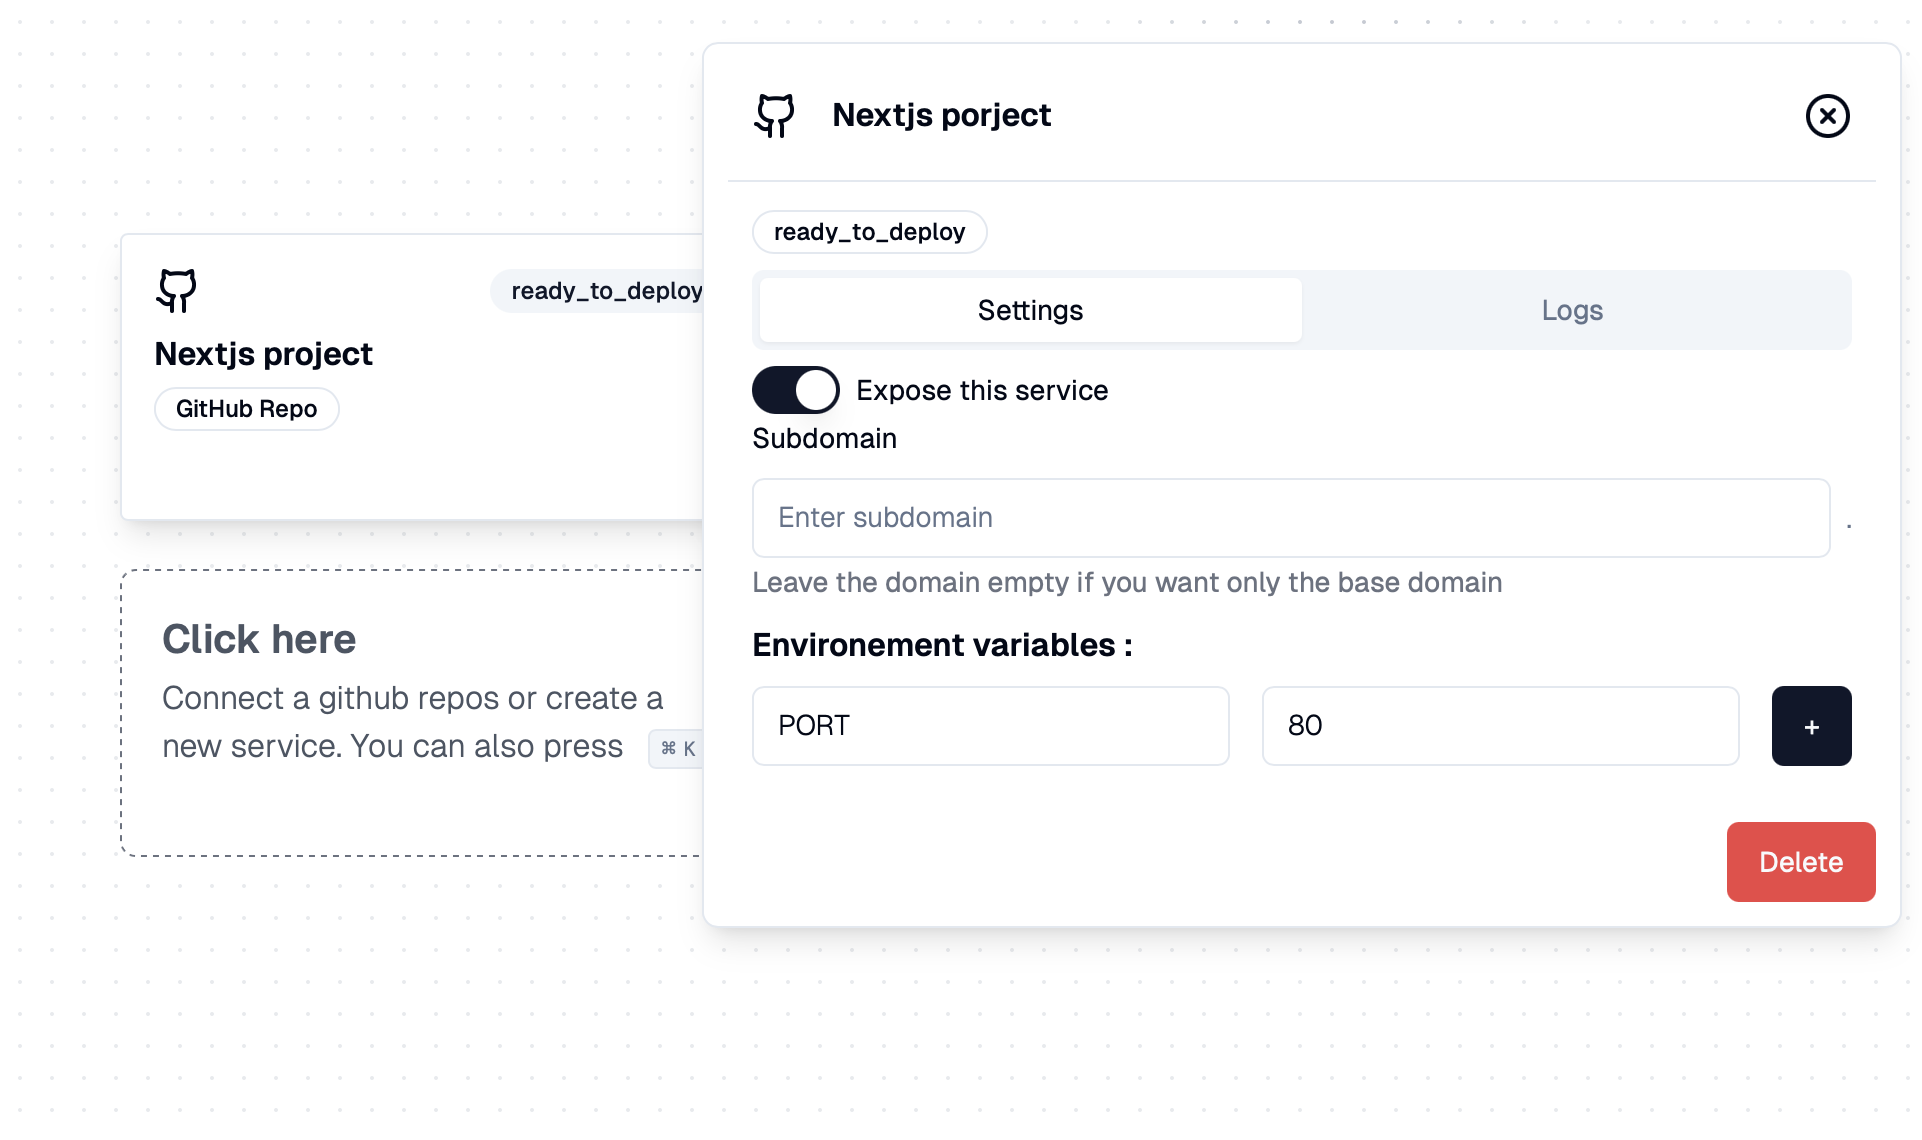
Step 5: Select and Deploy Your NestJS Project
Now, it's time to deploy your NestJS application:
- From the dashboard, select the NestJS repository you want to deploy
- JustDeploy will automatically detect that it's a NestJS application
- Configure any necessary environment variables
- Click "Deploy"
That's it! JustDeploy will handle the rest, including setting up Docker containers, configuring Nginx, and setting up continuous deployment.
What Happens Behind the Scenes?
When you deploy your NestJS app with JustDeploy, several things happen automatically:
- Docker container creation: JustDeploy creates a Docker container optimized for NestJS
- Build process: Your NestJS application is built with production optimizations
- Reverse proxy configuration: Nginx is set up to serve your application
- HTTPS setup: SSL certificates are automatically provisioned and renewed
- Continuous deployment: Any changes to your main branch will trigger automatic redeployment
Benefits of Using JustDeploy for NestJS Deployment
- Simplicity: No need to manually configure servers or write complex Docker configurations
- Performance: Optimized for production NestJS deployments
- Security: Automatic HTTPS setup and updates
- Scalability: Easy to scale as your application grows
- Cost-effective: Use your own VPS instead of paying for expensive hosting services
Conclusion
Deploying a NestJS application on your own VPS doesn't have to be complicated. With JustDeploy, you can have your application up and running in minutes, with all the best practices implemented automatically. This approach gives you full control over your infrastructure while maintaining the simplicity of a managed service.
Try deploying your NestJS application with JustDeploy today, and experience the perfect balance between control and convenience.
Next Steps
After deploying your NestJS application, you might want to:
- Set up custom domain names
- Configure environment variables for different environments
- Implement monitoring and logging
- Set up CI/CD pipelines for testing before deployment
- Configure database connections and migrations
JustDeploy makes all of these steps straightforward, allowing you to focus on what matters most—building great applications.